Wednesday, February 27, 2013

Getting started in blacksmithing

It should come as no surprise to most who know me that I have some abnormal hobbies. Well, abnormal is subjective, because I think it is totally normal. I have always had a fascination with the "old way" of doing things. I enjoy making things by hand, with traditional tools. I love to study technology from early time periods...firecraft, homesteading, tool making, and self reliance. So one day I decided that I wanted to learn something new: Blacksmithing!

My interest began like most my interests do...on the internet, doing research. I eventually purchased a book and began to learn about the art. From the techniques used to create things, to how to build the forge. Going to a local scrap yard, I was able to speak with the owner, who happened to have an anvil for me. a 136 pound, rusty, crude looking anvil. He cut me a deal, $10.00, to get it out of his shop. Little did I know what that hunk of metal I bought was valued at!


A little clean up with a wire wheel, and the anvil became a much prettier piece of steel! I was able to identify the anvil as a Arm and Hammer, worth much more than $10.00 to say the least.


So once I bought the anvil, it was time to build the forge and stand. The forge design was easy. One search on Google and I came of with the brake drum forge. Thanks to a guy at work, I got my hands on a drum for free. Then I bought some sections of 2 inch black pipe to create the forge base piping. The drum is attached to the floor flange by drilling holes and simply bolting it on.


Then I bought two sections of 6x4 treated lumber. I measured the right length and cut the sections. I had trouble cutting them all to the right length, so I had to put some work into evening them out. I then used some hardwood for a top and bottom plate. (The anvil rusted a little since it was sitting in the garage during a temperature swing. A little more wire wheel treatment should get rid of it).


And that's it! My poor neighbors may soon hear the ping! ping! ping! of metal being pounded and twisted into awesomeness.

Thursday, February 21, 2013

New website design!

Beardventures has been re-designed! I am going to start categorizing all my blog posts into the categories at the top of the page. I will reserve the main page for updates, important blog posts, and GIVEAWAYS! With any luck I will be starting some giveaways for anyone who follows my blog and comments. Details will come later!

Tuesday, February 19, 2013

Cold Weather Survival Shelter Testing

Last week a friend and I decided to go on a winter bushcraft/survival skills trip. The projected low for the night was 15 degrees with a wind chill of 9 degrees. Actual was 12 degrees, with wind chill at 6 degrees. So it was cold to say the least. The perfect night to build a debris hut!

Our first order of business was to select a suitable camp location. The property we were on had a large stream running through it, so water was not an issue. We eventually settled on a location right along the stream, and slightly elevated to stay out of the cold sink. We decided a two-person debris hut would be the most appropriate shelter given the cold conditions, so we began constructing the frame. We placed the foot end towards the wind, and constructed the hut much like a traditional debris hut, but built a flat roof connecting the two hut frames.


The sides and roof were constructed by lashing a few cross pieces to keep the framing sections from rolling off the frame.


The sides were then filled in with leaves. As long as you pile leaves starting at the bottom and building upwards, they don't fall through the framework. At least 2 feet of debris is necessary to insulate and keep the wind out.


We then started a fire, which carried us through the evening. 12 degrees was manageable with a good fire, and the woods provided plenty of dead wood for the fire. The shelter turned out to be pretty warm. We did cheat and use camp pads (hey, we can't leave ALL the luxuries behind) and sleeping bags. Without them we would have been cold, but alive!

Wednesday, February 13, 2013

Using the Vargo Titanium wood stove and Kleen Kanteen bottle


A while ago I bought a Vargo Titanium Hex stove and a Kleen Kanteen single wall stainless water bottle. Well, the stove and the bottle were just too pretty, and I just had to get them dirty, so I decided to actually get outside and play with them. Why wood stove? Well, I like the idea of not having to carry fuel. Not to mention the ambiance that even a small fire gives me. It’s that camping smell! For someone who wants less fuss, I would recommend looking into alcohol stoves, or if you prefer something even easier, then a canister or gas stove.

Tools I used to uglify my survival bottle/stove:


This is the stove. Notice how it is set up. There are several folding panels which flip up and snap into the attached base. The result is a hexagonal tube which has a single door to put combustibles inside. Everything folds down flat into that small black pouch you saw in the first picture.


The bottom has holes in it for air flow, and it sits slightly elevated. Being environmentally conscious, I like the idea here because it protects the ground and promotes leave no trace ethics every outdoorsman/outdoorswoman should strive for.


To get my water to a boil, I used my dryer lint and some wood shavings as my starter. Small twigs were added on top of that, and I ignited it using a firesteel. I then added small sticks, no longer than 3-4 inches and no thicker than a finger, since I just wanted enough fire to boil water.


Success! The fire was started. Once it was going well I closed the door, opening it occasionally to add fuel. The boil took about 10 minutes, but with practice I could get it down quicker. One of the things I noticed was how dirty cooking on a wood stove is compared to alcohol stoves. Due to the imperfect combustion of a wood fire, the bottom of your bottle becomes coated in soot. The inside of the stove does as well. Not a huge problem, but something to keep in mind when you decide to place that bottle back in your expensive backpack. The stove, of course, has that nice nylon case, so no worries there.


As light as this stove is at 4.1 ounces, this is something nice to have in the bottom of your backpack for when you underestimate how much fuel you need and run out!

Selecting the right type of rope for the job

This is part of my series on rope basics! For part one please visit: Learning about rope and cordage

So of all the different kinds of rope, what right t do you purchase for your application? In order to do this, you have to ask yourself some questions. How strong a rope do I need? How much stretch can I tolerate? Will this rope get wet or freeze? What type of loads will this rope be subjected to?


Of course, when we’re talking survival cord, almost anything goes. Most people carry 550 paracord (which was used for rigging parachutes in the military, not sure if it still is). 550 cord is strong (hence the name, rated to be about 550lb breaking strength), lightweight, and versatile. It consists of an outer sheath with 7 small inner strands. Paracord stretches, but usually does not return to its original length. The inner strings can be removed and used individually to create a net, fishing line, trap line, or to extend the length of the cord. Bank line (nylon twine), even line from a child’s kite (keep it on the handle for ease of carrying) works great for survival. Remember though, when it comes to surviving anything you have with you at the time works.

For marine or water applications, rope must be chosen carefully. Certain rope is better suited for use as lines on a boat than others. For anchor line, nylon is the way to go. The stretch should provide some relief on the anchor so the boat doesn’t uproot it. On a sailboat, lines are most important. For the halyards you want a very low stretch, high UV resistant rope. Dyneema would be a good choice here, though some use polyester as well. The halyards must be able to hold the sails up tight while not giving much. When it comes to the sheets (for those of you that don’t know sailing, sheets are the lines attached to the control end of the sails) stretch is not as important, but still should not be too stretchy. Handfeel is incredibly important here so you don’t tear up your skin trying to haul the sheets in (that also means pick the larger diameter sheets ) Polyester is widely used for this purpose. Heck, polyester is widely used for most lines on a sailboat. Dyneema is expensive stuff, so lots of people use polyester, unless they are racing and rope selection means winning or losing a race.


Rope is, of course, widely used for rescue, rock climbing, rappelling, tree climbing (for you arborists), and caving. For these applications, almost all rope is kernmantle construction, and made of nylon. When a climber falls, a huge amount of force is placed onto the rope. If the rope were static, low stretch rope, a climber would most likely not survive a fall, as they would break their back. Thus, nylon rope is used so that the climber bounces at the bottom of the rope (called dynamic rope). Climbing ropes come in a variety of diameters, from skinny 8mm twin ropes (rope designed to be used in pairs, doubled up to every protection point) to chunky 13mm rescue rope. Static rope is used as well, but generally for rappelling, rescue, or for slings.


And by popular request from my friends over at Hammock Forums, I will touch on rope used in a hammock suspension! Hammock suspensions must deal with a large amount of force. Though mostly static force, we are asking a lot from our thin ropes that we use to keep us hanging in the trees! There is more than just our body weight on the hammocks though, when you consider angular forces, the additional weight from bounce when we get in them, etc. Amsteel, a brand of rope using (you guessed it) Dyneema, is one of the most popular ropes for the hammock suspension. The stuff is amazingly strong and very low weight. Dyneema (High Modulus Polyethylene) is, in my opinion, the best suspension out there. Though it costs more, the weight and size differences are huge! Amsteel is stronger than a metal cable with the same diameter. With my 2 hammocks I use Amsteel whoopee slings for the suspension connected to nylon tree straps. The only downside is the cost.

Warbonnet Blackbird hammock & Whoopie Slings

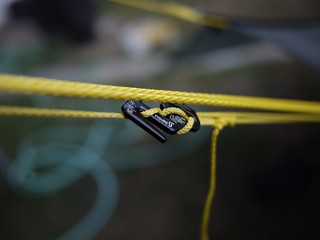
As far as tarp suspensions go, we want low stretch here as well. I like high visibility line so I don’t trip over them once they are in place. Zing-It, an arborist throw line, is popular due to its size, strength, and relatively cheap cost. I personally use Glowire sold on Lawsonequipment.com. It is a Dyneems/Dacron hybrid and highly reflective orange rope. It’s only rated to 225 lbs, which makes a perfect tarp line, but not suitable for hammock suspension. They put reflective tracers in the wire to really make it stand out.
Almost all lines used in hammock applications are braided. This is due to its higher strength. Twisted rope is really not used all that much in any application, except maybe on boats. Kernmantle is really a specialty rope that is used for limited and specific applications.

Warbonnet Blackbird hammock & Whoopie Slings

All that being said, next week I will be talking knots! I will list my top 10 knots, including how to tie and use them!


Monday, February 4, 2013

Learning about rope and cordage types


There is no doubt of the usefulness of rope and cordage. Rope can be used to tie a clothesline in the backyard, used to haul food out of the reach of critters, set traps, or even tie your kids up in a closet when they misbehave (don’t do this please-it would be funny, but you would probably go to jail. Not cool).

So with all the different uses out there, it should come as no surprise that there are many different kinds of rope, and it can be confusing. I am going to try and give everyone a little ropeducation (it’s the best I could come up with. Sorry, it’s embarrassing).


Let’s start with the two basic rope material categories: natural and synthetic. The vast majority of rope today is synthetic. Synthetic rope is made up of man-made, engineered material. These are your nylons, polypropylenes, polyesters, and others. There are MANY different types of man-made rope materials. Some are better than others. For example, Nylon is one of the strongest synthetic ropes, but loses some of its strength when wet. Polypropylene is cheap and relatively strong, but is prone to break down in UV rays. Polyester has much less stretch than nylon, just as strong, and more durable. But polyester is more expensive. The picture at the top of this post is of a climber carrying synthetic rope.

Hemp Rope


There second rope material is natural rope. Natural is anything you find in nature which can be used as rope or cordage. Synthetic rope is better than natural rope in almost all situations. It is heavier, weaker, and bulkier. Natural rope that you can purchase at a store is generally some variation of hemp rope. Above is an example of hemp rope. Notice the frays of hemp that make up the rope.

Twisted rope


Now that we have that out of the way, let’s talk about rope construction. Rope is made by taking small strands of a fiber and twisting them together in a pattern to create a larger, stronger strand. There are a few different construction types: twisted, braided, and kernmantle.

Twisted rope is exactly how it sounds: individual fibers twisted together, forming a rope with a twisted look. Twisted rope is the weakest and cheapest type of rope construction.

The next step up in strength is braided rope. Rope can be single or double braided. Single braid consists of individual strings braided together, much like hair is braided. Double braided is basically a braid inside of another braid.

The strongest and most abrasion resistant material is kernmantle. Kernmantle rope consists of an inner core and and outer sheath. The core is generally twisted together, and the outer shell is braided. This is what you see in climbing ropes and other high demand applications. It is naturally one of the most expensive rope types.

Braided rope

Kernmantle rope showing the core

So with all the different types of rope, what do you need? Your rope selection will depend primarily on the application. After all, some of us (climbers, military, law enforcement, firefighters) use rope to save lives. Others use rope to protect expensive investments (it would be a shame to see your yacht playing bumper boats with others in the marina because you used sub-par rope). See part two of my rope and cordage series: Selecting the right type of rope.